


Studio Diary: July 13, 2024
Plumbing the depths of a dissonant, 1-second piano sample

This edition of the studio diary focuses on a recent video shared to YouTube, dated July 13, 2024. Just like the last studio diary post I made, the connection between iPad and laptop is at the center of this performance, and it’s built from a very short sample of the same recording of improvised piano. The sample is played back in the Samplr app and embellished significantly with effects, drums, and sequenced VSTs in Ableton Live.
Here’s the video in question:
I’ll break this down as best I can in 3 parts:
The sample: how it was sourced, played back, and processed
The drums: how they’re performed and effected
The instruments: additional layers from sequenced VSTs
Part 1: The main sample
Source
The sound at the core of this whole thing is the tail of a sustained piano chord. I sourced a 1 second long sample from the very same 4+ minute piano improvisation I referred to in my last studio diary piece from June 29 (linked here if you’d like to listen to the full clip).
I used AudioShare to trim and normalize a section of the longer recording; it sounds like this in isolation:
I like this sound quite a bit, because it has an “elusive” quality to it. There’s some dissonance and tension in there that made me wonder how it could resolve. It felt to me like listening to an idea that got cut off prematurely; there was definitely room to build on this and finish the thought.
Playback
Sample in hand, I loaded it in Samplr three times over: one at normal pitch, the next one an octave up, and the last instance 2 octaves up. Those who know Samplr will recognize this particular playback engine - I still don’t know its name, but it’s my favorite way of “elongating” a shorter sample. You can select the “center” of a looping segment with your fingers, then choose attack/decay settings and how far on either side of the center you want the loop to extend. This allows for some interesting stutter effects at shorter loop lengths and attack decay times, and smoother loops at longer lengths/longer decays.
I typically like to play a sample by dragging 3 or 4 fingers across it, “scanning” through the waveform with longer loop lengths and decays to generate a continuous pad from a unique source. I will typically record my finger movements to add motion and dynamics, as well. When 2 or more loops are overlapping, it sounds a lot more interesting than a simple ping-pong loop with 2 endpoints, especially on a sample as short as 1 second like this. That’s what happened here: I scanned through each of the 3 samples with 4 fingers, so there are essentially 12 looping segments overlapping on just 3 seconds of audio. It sounds and looks like this:
Processing
The output of Samplr is fed back into its own channel in AUM, where 3 things happen:
I treated it with some EQ from FabFilter Pro-Q3 to notch out some of the ringing upper mid frequencies.
I sucked in the stereo width a little bit, because I noticed there was a bit too big of a hole in the center of the stereo image for my comfort, and I wanted to avoid any phasing later.
I routed a pre-fader send of the Samplr audio to a separate mix bus (Bus A) loaded with additional effects and plugins to create a secondary version of the sound to blend in.
Blending a second, more heavily effected layer on Mix Bus A
This pre-fader send is one of my favorite things to do on the iPad, in particular, because it’s so easy to mix parts with your fingers and create interesting blends of unprocessed and processed sounds. I have audio sent to this channel pre-fader, specifically, so that I can mute all audio of the unprocessed Samplr sound when necessary, and still have that audio available to work with on the effects bus if I want.
On Bus A, I’m running several effects to radically alter the sound of the Samplr output and blend with the original sound:
Gustav Scholda DSP (GSDSP) MagicBlur - a “spectral blur/freeze” effect that allows you to freeze and blur incoming audio. You can create 4 different “snapshots” of the frozen audio, then blend between them with an X/Y pad and modulate parameters with LFOs. There are pretty wild possibilities here, but I have it set up fairly simply as a pitch shifter to transpose incoming audio up 1 octave with some LFO modulation on wet/dry mix.
AUM’s built-in LP/HP filter - a simple DJ-style low/high pass filter for tone shaping.
Toneboosters BitJuggler - bitcrushing, aliasing, distortion…this app does it all. I personally love having it as a simplified (and slightly more subtle) alternative to Unfiltered Audio’s LO-FI-AF. In this track, I have it set to 8-bit depth and 14kHz bitrate for some digital sheen and distorted artifacts in the high end frequencies. I adjust the mix with a dedicated control on the channel level so I don’t have to open the UI too often.
AudioThing Lines - an emulation of an old bit of hardware I’m not super familiar with - the "Axel Line Simulator” - but I personally love the distortion options here, as well as the “line selector” mode that acts like a high-pass filter with tons of character. I cranked the distortion and set it to Line D for the most lo-fi sound possible.
Audiomodern Gatelab - I’ve talked about this plenty of times before, but I love this effect for applying subtle volume fluctuations at lower mix levels, and adding choppy rhythmic feel at full mix levels.
AUM’s built-in stereo-to-mono tool - I’d rather have this secondary, heavily processed sound collapsed to mono, but it’s fun to use this tool occasionally to spread any panning effects from Gatelab even further and make them as dramatic and wide as possible.
FabFilter Pro-Q3 - I have a subtle dynamic EQ set to push down the high end with a 2kHz shelf, mostly as a little bit of “tonal insurance” to ensure things don’t get too harsh and totally out of control with all the distorting, aliasing, and pitch-shifting effects applied here.
Here’s a quick demonstration of what each of these effects sound like individually, then together, when processing the output of Samplr.
Part 2: Drums
Creating the first layer with Patterning 3
Patterning 3 has quickly become my favorite drum machine on iPad. I was already a huge fan of the previous version, but it was somewhat limited as a standalone application. So much of the fun of Patterning’s layout and feature set is in the on-the-fly adjustments, per-step variability, fills, and applying other “performance” effects to a drum sequence, and it’s very difficult to do that when you’re toggling back and forth between a DAW and the full, standalone application. Having it in AUv3 format makes it so much easier to open up and tweak right alongside everything else happening in the session. I also love the flexibility of multi-output audio, .ALS file creation and loop/sample file export, and all the other file management/mixing/routing niceties that help me take my drum sounds back into Ableton Live, where most of my in-depth mixing happens anyway.
I’ve set up 2 “full” patterns for this track, A and B, with a “fill” section for each that can be triggered with the press of a button in the app. I designed the fills to be sparse and emptier versions of the associated pattern, to be deployed as a break or transition when needed. For most of the song, I’m simply toggling between these 4 versions of the beat within the UI.
Patterning 3 is processed by a few effects:
Audiomodern Gatelab for additional choppiness, glitching, and stuttering.
FabFilter Vocano 3 set to be a bandpass filter around 500hz; the overall level is responding to an LFO that’s being modulated by the incoming audio with 2 envelope followers. I can adjust the width of the bandpass with a dedicated slider, as well, and I’ll use that to open up more of the frequency spectrum when the mix is up. This allows for very creative lo-fi and dampening effects, as I’ll demonstrate below.
Audio Damage Replicant 3 set for relatively subtle stutter and glitching effects. I have dotted-eighth delay on it, too, for some extra spaciousness.
Audio Damage Rough Rider 3 set to heavy, thick, high-ratio compression. I was hoping for these drums to sound squashed and compact; Rough Rider is perfect for heavier applications like this.
Here’s what all this sounds like: first, Pattern A and its fill; then, Pattern B and its fill. Finally, I’ll add in individual effects to demonstrate their impact, as well.
Creating a second layer with Playbeat 3
For additional rhythmic interest, I decided to set up a second drum pattern using Audiomodern Playbeat 3. While not as playable and controllable as Patterning 3, I love this app for its randomization features: any one of its 8 tracks - as well as the master pattern with all of them together - can be shuffled endlessly after a preset number of bars for random, continuously morphing patterns. This is great for adding unpredictable hi-hat patterns and “atypical” percussion on top of a steadier kit, for example. I loaded it up with mostly static and electric noises to create high-frequency clicks and cuts that could be layered on top of my Patterning 3 beat without interfering too much.
I have several effects manipulating this pattern:
Rough Rider 3 makes another appearance here, too, squashing the dynamics considerably so that nothing jumps out too prominently.
AUM’s built-in HP/LP filter for removing low end.
Replicant 3 for more chaotic glitching and stuttering than what’s happening on the “main” beat from Patterning 3.
Gatelab for heavy chops and dropouts, adding 1/8th note emphasis.
Here’s what this sounds like: first the raw pattern, then with effects applied, and then in context alongside the Patterning 3 beat.
Part 3: Additional instrumentation
MIDI Sequencing with Fugue Machine
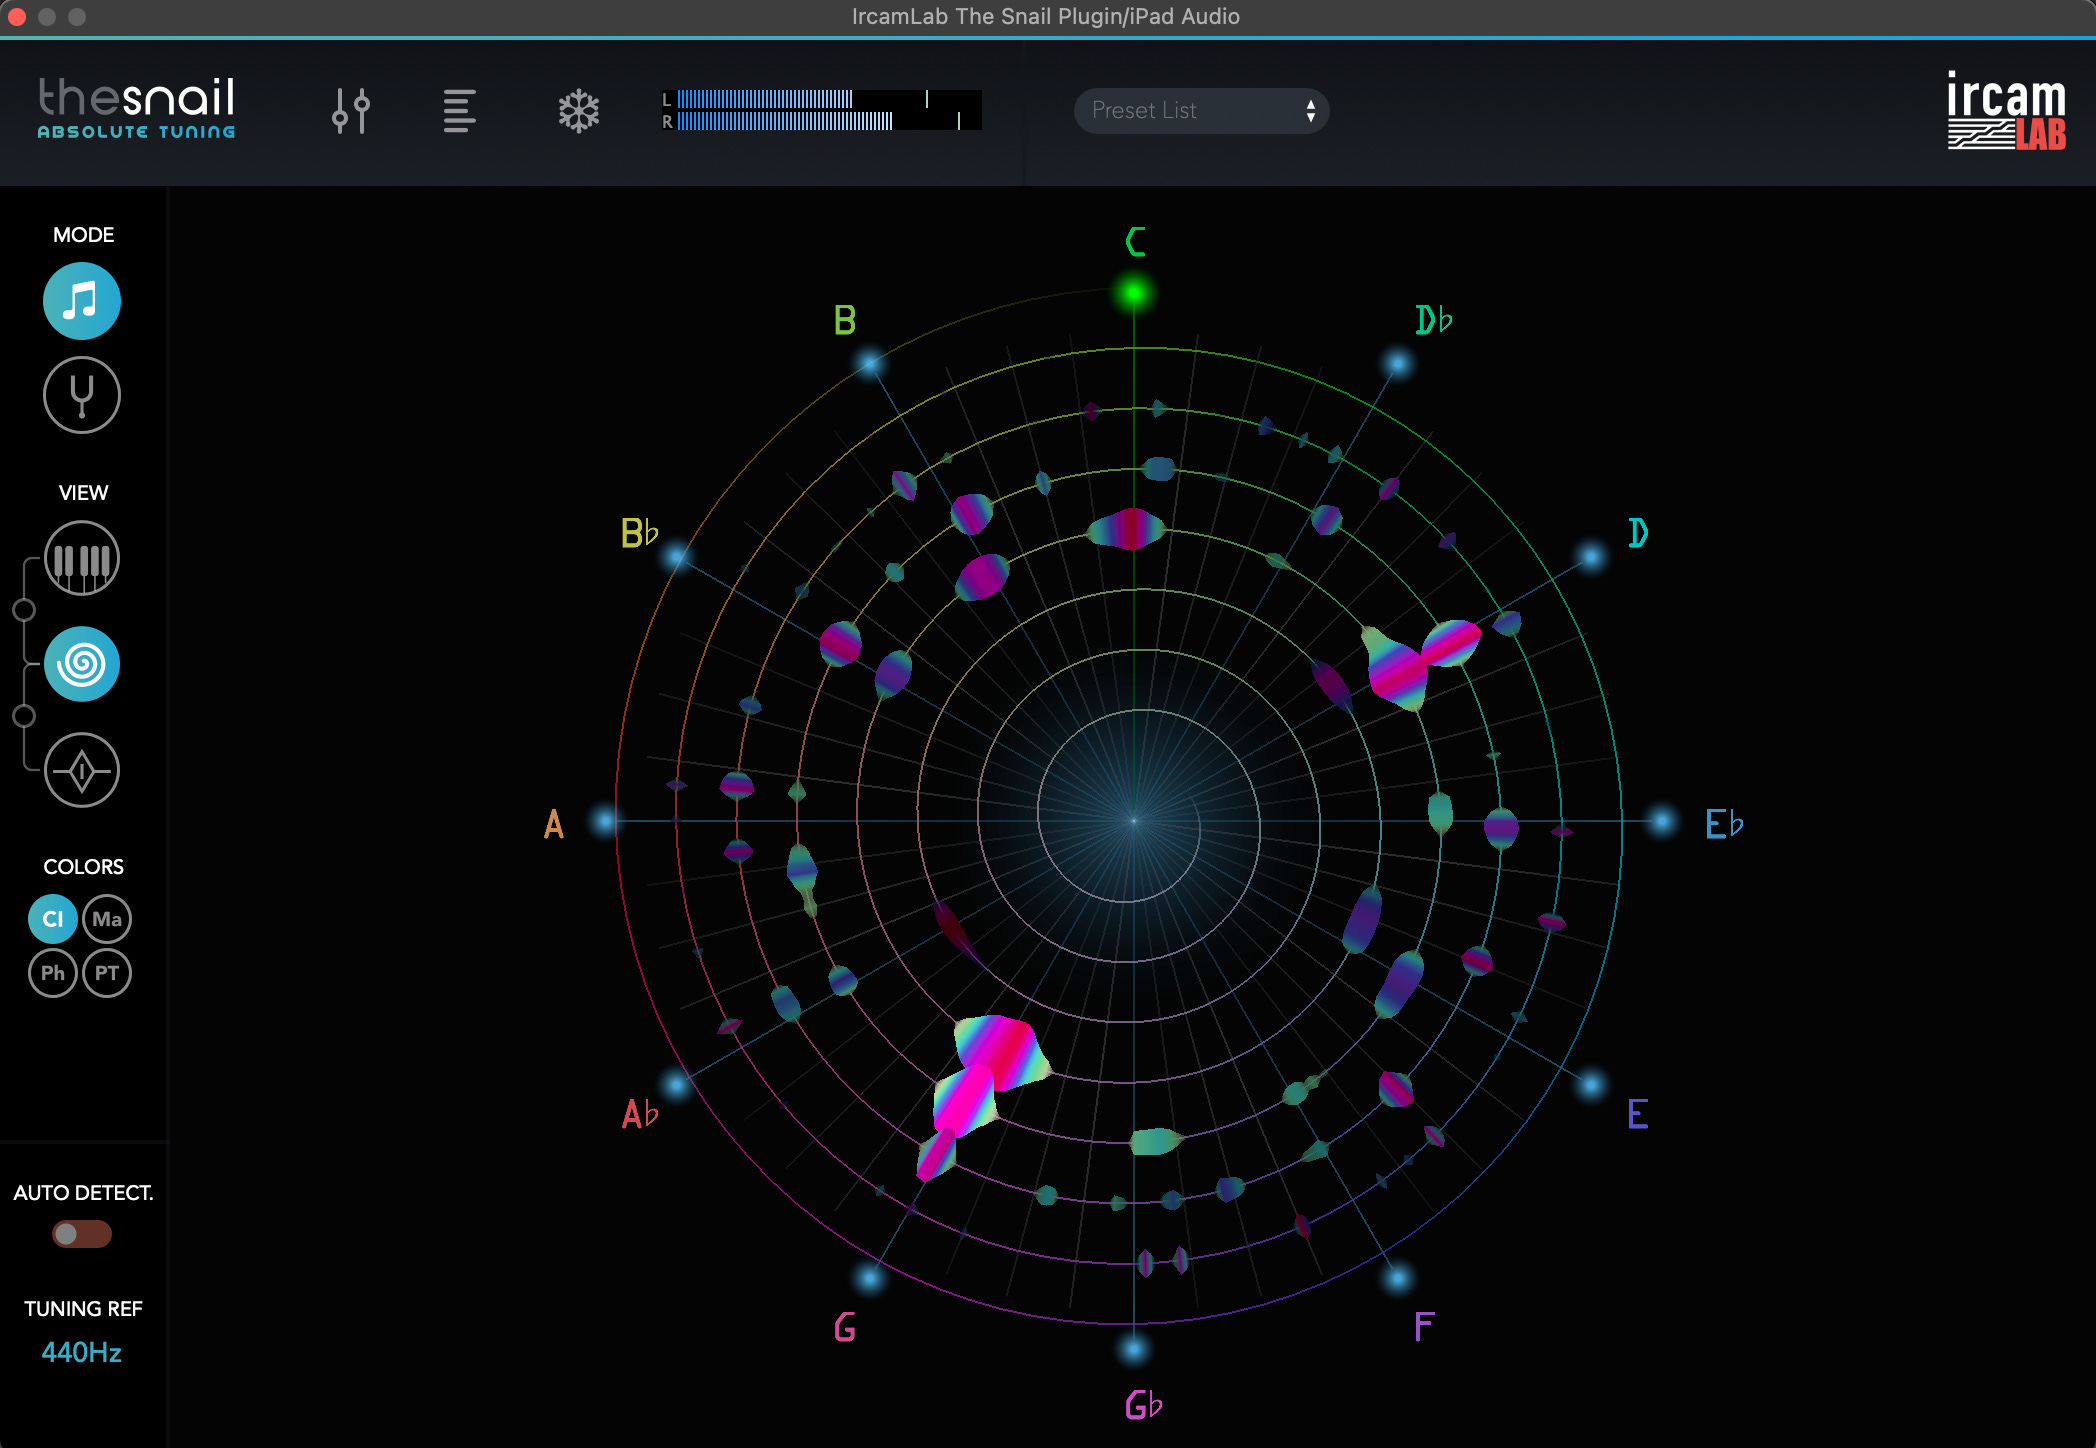
I spent a ton of time looping the short piano sample over and over again while thinking of how I could potentially resolve it with other parts. After some analysis with IrcamLab’s The Snail tuner plugin, I thought it felt best overall when I played in G minor around it. I never did figure out the perfect chord progression to accompany this clip, but I kind of like that there was some dissonance in the piece the whole time I was building it up.
I leaned in to the G minor feel and set up a very basic sequence in Fugue Machine with just 2 notes, G5 and D#5, with 4 playheads running across them:
Playhead 1: MIDI Channel 1, forward loop, /32 tempo, start on 1st bar, Octave 0 and Pitch at 0
Playhead 2: MIDI Channel 1, reverse ping pong loop, /64 triplet tempo, start on 1st bar, Octave -2 and Pitch 0
Playhead 3: MIDI Channel 2, reverse loop, /32 dotted quarter tempo, 16 start, Octave 0 and Pitch +4 semitones
Playhead 4: MIDI Channel 2, reverse ping pong loop, /16 triplet tempo, start 1, Octave -1 and Pitch 0
This MIDI information was sent back to my laptop running Ableton Live 12 Suite over USB, thanks to the iConnectivity Audio4c, as usual.


Using Chordjam to play Slate & Ash Landforms, Native Instruments Noire, and Omnisphere
The MIDI information from Fugue Machine lands in Ableton Live, and triggers randomly-generated chords in a G minor key from Audiomodern’s Chordjam plugin. Velocity, voicing, and timing of each note in the chord is also randomized. I’ve written about this tool before, but I love how easy it is to generate beautiful chord progressions and quickly audition ideas. I don’t always keep 100% of what it spits out, but for getting ideas started and coming up with chord shapes that I wouldn’t think of on my own, it’s an amazing tool to have in your plugin folder.
Fugue Machine playheads 1 and 2 trigger the first instance of Chordjam on MIDI Channel 1. These chords are then routed to Native Instruments Noire piano and a synthesizer patch I made in Omnisphere, because I specifically wanted the very lowest notes of Playhead 2 (which, remember, is set to play 2 octaves down) to trigger deep bass tones from these instruments. Here’s a sample:
Fugue Machine playheads 3 and 4 trigger the second instance of Chordjam on MIDI Channel 2. These chords are then routed to Slate & Ash Landforms, which is playing a synth-like patch I made featuring high brass and low woodwinds. They are processed by 3 of the internal effects available with Landforms: saturation, resonant filtering, and an amp speaker simulation. I carved out space in the low end here using Ableton’s Auto Filter as a high pass filter so that it didn’t clash with the piano and synth tones, and instead floated over top. Here’s a sample:
Each of these instruments has an instance of Soundtoys Tremolator slowly modulating its volume at a slightly different speed, so that they fade in and out over time and aren’t always playing full blast.

Moog Model D on iPad
The final piece of the tonal puzzle sits with Moog’s Minimoog Model D app on the iPad. Just like Moog’s Animoog and Model 15 apps, I could wax poetic about how good this is compared to the original hardware, but I’ll leave it to you to download for the criminally low price of $29.99 in the App Store (0.05% of the price of a brand new Model D reissue) and try for yourself.
You’ll notice in the video that I’m using this as a bass layer underneath all the other chaos happening, and this is my most common use case. This patch is my default bass sound, with an aggressive white noise layer that I can fade in when I open up the filter. To emphasize the subs and beef it up even further, I have it running through Unfiltered Audio’s excellent Bass-Mint app.
Mixing/Master Effects in Ableton Live
Nothing else is really happening in Live, but I should note here that I have a few effects on my master channel that help balance all of this out: FabFilter Pro-C 2 compressor, Oeksound Soothe 2, and iZotope Ozone 10 for volume and stereo imaging.
Thanks for reading, as always. See you next time!
I’m happy to meet 1-on-1 if you’d like to discuss any of this in more depth. It’s been wonderful to meet so many of you already and I’m happy to help however I can with your setup, workflow, works in progress, etc. - just get in touch!
Love this breakdown. This skilled view into using these tools is so cool even though it runs so counter to how I have used a similar batch of tools. My “method” is much looser to the level of being lazy and is neither better or worse.
I love Fugue Machine. Have you played with Tardigrain by Erik Sigth? https://apps.apple.com/ca/app/tardigrain/id1344470087
Immediately purchased a bunch of Olympia Noise Co. apps right after reading this!